Page 1 :
DELHI PUBLIC SCHOOL R.N. EXTENSION, (Under the aegis of the Delhi Public School Society, New Delhi), SCIENCE PRACTICALS, , Class X, Term I EXPERIMENTS, (Chemistry), Aim To find the pH of the following samples by using pH paper/universal indicator:, a. Dilute Hydrochloric Acid, b. Dilute NaOH solution, c. Dilute Ethanoic Acid solution, d. Lemon juice, e. Water, f. Dilute Sodium Bicarbonate solution, Theory, The pH is the measure of the acidic (or basic) power of a solution. It is a scale for measuring hydrogen, ion concentration in a solution. The pH scale varies from 0 to 14. At 25°C (298 K), a neutral solution has, pH equal to 7. A value less than 7 on the pH scale represents an acidic solution whereas basic solution, has pH value more than 7., pH is defined as the negative logarithm (base 10) of the hydrogen ion concentration in moles per litre., pH = -log10[H+], , Chemicals Required, Dilute HCl, Dilute NaOH Solution, Dilute CH3COOH solution, Fresh Lemon juice, Water and Dilute, NaHCO3 solution, Apparatus required: Test tubes, Test Tubes Stand, Dropper, Glass Rod, pH Paper strips and pH colour, chart, Procedure, , Step 1: Six clean test tubes is placed in a test tube stand., Step 2: Dilute HCl, Dilute NaOH Solution, Dilute CH3COOH solution, Lemon juice, Water and Dilute, NaHCO3 solution are taken separately in six test tubes and labelled., Step 3: One or two drops of each test solution on different strips of pH papers are put using a glass rod. Glass rod, used for one sample must be washed with water before used for the other sample., Step 4: Note the pH by comparing the colour appeared on the pH paper with those on colour chart for pH paper., 5. For determining the pH of lemon juice, squeeze the fruit and place 1 or 2 drop of the juice on the pH paper.
Page 2 :
Observations, , Results and Discussions, As pH depends upon H+ concentration and in an aqueous solution H+ and OH- ion concentrations are, correlated, therefore, every acidic and basic solution shows different colour at different pH., Precautions, 1. The test sample solutions should be freshly prepared and the fruit lemon juice samples should also be, fresh., 2. Glass rod used for one sample should be used for the other sample only after washing it with water., 3. Acids must be handled carefully., Aim: To study the properties of acids (dilute HCl) and bases (dilute NaOH) by their reactions with the, following:, 1. Litmus solution (red/blue), 2. Zinc metal, 3. Solid sodium carbonate, Materials required:, 1. Test tube, 2. Test tube stand, 3. Cork, 4. Test tube holder, 5. Boiling tube, 6. Droppers, 7. Flat bottom flask, 8. Burner, 9. Match box
Page 3 :
10. Beaker, 11. Thistle funnel, 12. Litmus paper/solution, 13. Fresh lime water, 14. Glass rod, 15. Dilute HCl, 16. Dilute NaOH, 17. Zinc granules, 18. Solid sodium carbonate, Theory:, What is acid?, Chemical species which donate proton or release H+ ions when dissolved in water are called acid. They, turn blue litmus solution to red colour., Hydrochloric acid reacts with zinc metal to produce zinc chloride and hydrogen gas. The reaction is given, below:, Zn(s) + 2HCl(aq) → ZnCl2(aq) + H2(g), Hydrochloric acid reacts with Na2CO3 to produce carbon dioxide and turns the lime water milky as it, forms calcium carbonate. The milkiness formed disappears when more than necessary carbon dioxide is, passed through the solution. The reaction is as follows:, Na2CO3(s/aq) + 2HCl(aq) → 2NaCl(aq) + H2O(l) + CO2(g), Ca(OH)2(aq) + CO2(g) → CaCO3(s) + H2O(l), CaCO3(s) + H2O(l) + CO2(g) → Ca(HCO3)2(aq), Experimental Setup for Litmus Test, Procedure:, , 1., 2., 3., 4., 5., 6., , Take a test tube stand and place two test tubes in it., Label the test tube as test tube 1 and test tube 2., Add 5 ml of blue litmus solution to test tube 1., Add 5 ml of red litmus solution to test tube 2., Use a dropper and add equal drops of hydrochloric acid in the both test tubes., Wait and observe the colour change., , Experimental Setup for Reaction with Zinc metal:, , Procedure, 1., 2., 3., 4., , Take a clean and dry test tube., Add zinc granules in it., Submerge the zinc granules in the test tube by adding hydrochloric acid to it., Close the mouth of the test tube with cork which has a glass delivery.
Page 4 :
5. A robust explosion takes place between 2-3 minutes liberating colourless and odourless gas., 6. When a burning match stick is got near the glass tube mouth the gas burns with a pale blue flame with a, pop sound., , Reaction:, 2HCl(aq) + Zn(s) → ZnCl2(aq) + H2↑, Experimental Setup for Reaction with solid sodium carbonate:, , Procedure, 1., 2., 3., 4., 5., 6., , Take a flat bottom flask with 1 gm of solid sodium carbonate and some distilled water., Take a clean and dry double bore cork and thistle funnel which has a delivery tube fitted to it., Close the mouth of the flat flask with the double bore cork., Add 2 mL of dilute hydrochloric acid., Colourless and odourless gas is liberated which is passed through the lime water using the delivery tube., The colour of the lime water changes to milky., , Reaction:, Na2CO3(s/aq) + 2HCl(aq) –→ 2NaCl(aq) + CO2↑+ H2O(l), Ca(OH)2(aq) + CO2↑ –→ CaCO3(s) + H2O(l), CaCO3(s) + H2O(l) + CO2(g) –→ Ca(HCO3)2(aq), Observation:, , Result and Conclusion:, 1. In the litmus test experiment the blue litmus solution turns to red when hydrochloric is added. Therefore,, acids such as HCl show acidic character., 2. Hydrochloric acid reacts with active metals such as zinc to form zinc chloride and liberate hydrogen gas., 3. HCl reacts with sodium carbonate to liberate carbon dioxide gas., Therefore, from the above three points we can conclude that HCl (Hydrochloric acid) is acidic in nature., , Precautions to be taken during the experiment:, •, •, •, •, •, , Conduct the experiment in clean test tubes., HCl is corrosive in nature and should be handled with great care., Take small amount of chemicals to perform the experiments., While shaking the solution and reaction mixture do not spill., Whenever you conduct a test for hydrogen, conduct it with the least amount of gas.
Page 5 :
Aim: Performing and observing the actions of1. Water on quicklime, 2. Heat on ferrous sulphate crystals, 3. Iron nails dipped in copper sulphate solution, 4. Reaction between sodium sulphate and barium chloride solution, On the following reactions1. Combination reaction, 2. Decomposition reaction, 3. Displacement reaction, 4. Double displacement reaction, Experiment 3(A) – Combination, Materials Required, 1. Quick lime (Calcium oxide), 2. Borosil beaker, 3. Glass rod, 4. Distilled water, 5. Dropper, 6. Test tube, 7. Litmus paper strips, Theory, When calcium oxide is mixed in water it dissolves and forms calcium hydroxide (basic in nature). During this, reaction, a lot of heat is liberated and therefore, it is called an exothermic reaction. The equation is as follows:, CaO(s) + H2O(l) → Ca(OH)2 (aq) + Heat ………(1), Due to the basic nature of calcium hydroxide, it turns red litmus paper blue in colour. When carbon dioxide gas is, passed through the calcium hydroxide the solution turns milky white., Ca(OH)2 (aq) + CO2 → CaCO3 + H2O, In the reaction (1) slaked lime is formed by combining two products viz, quick lime and water. Therefore, when, two or more than two substances combine to give a single product it is termed as combining reaction. The, reactions accompanied by the evolution of heat are called exothermic reactions., , Procedure, 1., 2., 3., 4., 5., 6., , Wash a borosil beaker with distilled water and dry it., Take a small amount of calcium oxide (quick lime) and slowly add water to it., Wash and take a clean glass rod to stir the mixture of quick lime and water., Touch the beaker carefully from outside., Observe the change., With the help of dropper take a few drops of the mixture from the beaker and place it on red and blue, litmus paper strips., 7. Wait and observe., , Observation, , Result and Conclusion, From the above experiment we can conclude that the reaction occurred between calcium oxide (Quick lime) and, water combine to produce one single product slaked lime (Ca(OH)2) is called combination reaction as well as an, exothermic reaction.
Page 6 :
Precautions to be taken during the Experiment, •, •, •, •, •, , Take a small amount of compound such as quick lime to perform the experiment., Since the reaction is exothermic avoid touching the mixture directly., Carefully pour water to the borosil beaker containing calcium oxide (quick lime)., Calcium oxide causes severe burns and therefore it should be handled with a spatula., Use good quality glass beaker during the experiment because if the beaker is of poor quality then there, are chances of crack on the beaker due to the exothermic reaction., , Aim: Observing the action of zinc, iron, copper and aluminium metals for the following salt solutions., a. Zinc sulphate (ZnSO4), b. Copper sulphate (CuSO4), c. Ferrous sulphate (FeSO4), d. Aluminium sulphate (Al2(SO4)3), Arranging the metals Zinc, Copper, Iron, and Aluminium in the decreasing order of reactivity based on, the results obtained from the above., Materials required:, 1. Aluminium foil, 2. Zinc granules, 3. Copper turnings, 4. Iron filings, 5. Copper sulphate solution, 6. Aluminium sulphate solution, 7. Zinc sulphate solution, 8. Four 50ml beakers, 9. Test tube, 10. Test tube stand, Theory:, What is reactivity series?, Different metals have different reactivities with chemical reagents. The metals that form positive ions by losing, electrons more readily. A more reactive metal displaces a less reactive metal from salt solution. Such reactions, are called displacement reactions. Consider an example, if a small amount of zinc is dipped in copper sulphate, solution, zinc is displaced from copper sulphate. The blue colour of copper sulphate fades and colourless zinc, sulphate solution is obtained. Therefore, zinc is more reactive than copper., •, , Aluminium has the ability to displace zinc, iron, copper from their respective salt solutions and, therefore is more reactive than them., Reactions:, 2Al(s) + 3ZnSO4(aq) –→ Al2(SO4)3 + 3Zn(s), 2Al(s) + 3FeSO4(aq) –→ Al2(SO4)3 + 3Fe(s), 2Al(s) + 3CuSO4(aq) –→ Al2(SO4)3 + 3Cu(s), • Zinc has the ability to displace iron, copper from their respective salt solutions and therefore is, more reactive than them., Reactions:, Zn(s) + CuSO4(aq) –→ ZnSO4 (aq) + Cu(s), Zn(s) + FeSO4(aq) –→ ZnSO4 (aq) + Fe(s), Zn(s) + Al2(SO4)3(aq) –→ no reaction, Zn(s) + ZnSO4(aq) –→ no reaction, • Iron has the ability to displace copper from its salt solution and therefore is more reactive when, compared to Cu., Reactions:, Fe(s) + CuSO4(aq) –→ FeSO4 (aq) + Cu(s), Fe(s) + FeSO4(aq) –→ no reaction, Fe(s) + Al2(SO4)3(aq) –→ no reaction
Page 7 :
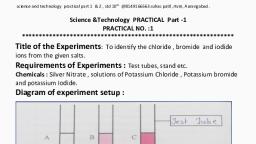
Fe(s) + ZnSO4(aq) –→ no reaction, No reaction occurs when any of the metals from zinc, iron, aluminium, and copper are placed in aqueous solution, of Al2(SO4)3., Therefore, from the above, we can conclude the reactivity of elements in the following order –, • Aluminium is more reactive than zinc., • Zinc is more reactive than Fe., • Fe is more reactive than Cu., Hence, Aluminium is the most reactive and Copper being the least reactive metal., The below table gives you an understanding of the colours exhibited by the metals and their salts:, , Experimental Setup:, , Procedure:, 1. Wash four beakers with distilled water, dry them and label them A, B, C, D., 2. Prepare 50 mL solution with 5% concentration by volume of ferrous sulphate, aluminium sulphate, copper, sulphate, zinc sulphate., 3. Pour ZnSO4 in beaker A, FeSO4 in beaker B, CuSO4 in beaker C, Add Al2(SO4)3 in beaker D., 4. Wash four test tubes with distilled water and dry them., 5. Put them in a test tube stand and label them as A, B, C and D as shown in the figure above., 6. Take 10 mL of the saturated ferrous sulphate (FeSO4), copper sulphate (CuSO4), zinc sulphate (ZnSO4), and, aluminium sulphate (Al2(SO4)3 ) in the test tube as shown in the figure., 7. Take metal strips of aluminium (Al), iron (Fe), copper (Cu), and zinc (Zn). Clean them with sandpaper, before using it in the experiment., 8. Now dip one of the four metal strips in all the four test tubes and observe if any colour change occurs in, all four test tubes.
Page 8 :
9. Continue step 8 with other metal strips by dipping in fresh aqueous solutions of metals and see the, displacement reaction., , Result and Conclusion:, , The decreasing order of reactivity of metals is as follows:, Al > Zn > Fe > Cu, Precautions to be taken during the experiment:, •, •, •, •, •, •, , Use cleanly washed and dried apparatus for the experiment., Clean the metals before dipping them in the solution. You can clean it with sandpaper., Use small quantities of aluminium sulphate, iron sulphate, copper sulphate and copper sulphate solutions, for the experiment., Handle the chemicals with care and do not allow them to come in contact with your skin., Make sure you wash the test tubes after every observation., Wash your hands thoroughly after the experiment as the salt solutions are poisonous.
Page 9 :
(Biology), Aim: To experimentally demonstrate that carbon dioxide is released during the process of respiration., Principle/Theory: The process of respiration is biochemically carried out wherein food, glucose to be, precise is oxidized and energy is released. In this experiment, gram seeds (moistened) are used. The, purpose of using these seeds is that they release carbon dioxide and are respiring actively. The released, carbon dioxide is consumed by the solution of KOH., Material Required, • Soaked gram seeds, • U-shaped delivery tube, • Conical flask, • Blotting paper (moist) /cotton wool, • Thread, • Water, • Beaker, • Test tube, • Rubber cork with a single hole, • Freshly prepared KOH solution (20%), • Vaseline, Procedure, • Germinate close to 25 seeds. This can be done by wrapping them in moist blotting paper or, cotton wool for around 3 to 4 days, • Set up the germinated or sprouted seeds in the conical flask. Spray some water into the flask to, dampen the seeds, • With the help of a thread, suspend the conical flask containing the test tube having a freshly, prepared 20% KOH solution., • Use the rubber cork to seal the opening of the conical flask., • One edge of the U-shaped glass delivery tube present in the conical flask should be inserted, through the hole in the rubber cork. The other edge should be placed into a beaker that is, saturated with water, • All attachments of the set-up should be sealed. This can be done using vaseline to create an airtight environment, • The initial water level present in the U-shaped delivery tube needs to be marked., • Leave the experimental set-up uninterrupted for 1 to 2 hours. Observe the fluctuations in the, water level in the tube., Observation, Careful observation after a certain period of time reveals that the water level in the U-shaped delivery, tube has risen in the beaker., Conclusions, The rise in level water indicates that carbon dioxide is released as a result of germinating gram seeds, during the process of respiration in the conical flask. The carbon dioxide that is released in the process is, absorbed or consumed by the KOH solution that is suspended in the test tube in the conical flask,, creating a vacuum or a void in the flask resulting in the upward water movement in the tube. Hence, the, water level in the tube changes., Precautions, • The seeds that are to be germinated needs to be moistened, • Air-tight environment for all the connections in the experimental set-up, • The KOH solution that is used needs to be freshly prepared
Page 10 :
(Physics), Aim: To determine the focal length of:, • Concave mirror, • Convex lens by obtaining the image of a distant object., Theory:, Concave mirror: A concave mirror is defined as the spherical mirror whose reflecting surface is curved inwards, and follows laws of reflection of light., • If the image formed is real, inverted and very small in size, then the parallel rays of light meet the point in, the front of the mirror., • The image formed by the convex lens is real and can be obtained on the screen., • f is used to denote the difference between the principal axis P and the focus F of the concave mirror., Convex lens: The convex lens is thicker in the middle and thinner at the edges and is also known as the, converging lens., • The refracted rays from the parallel beam of light converge on the other side of the convex lens., • If the image is obtained at the focus of the lens, the image would be real, inverted and very small., • f is the focal length which is the difference between the optical centre of the lens and the principal focus., • The image can be obtained on the screen as the image formed by the lens is real., , To determine focal length of a given concave mirror, Materials Required: A concave mirror, A measuring scale, A screen holder, A mirror holder, A mirror, stand, Procedure, 1. The distance between the selected distinct object should be more than 50 ft., 2. The concave mirror placed on the mirror stand and the distant object should be facing each other., 3. The screen should be placed in front of the reflecting surface of the mirror. To obtain a clear, sharp image, the screen should be adjusted., 4. Using a metre scale the distance between the concave mirror and screen can be determined. The distance, is the same as the focal length of the given concave mirror., 5. Repeat the above procedure thrice to calculate the average focal length., , Experimental Setup, , Observation Table, Sl.no, , Position of concave mirror (M), , Position of screen (S), , 1, 2, 3, Calculation, Following is the mean value of the focal length of concave mirror:, , Focal length = (M-S) cm
Page 11 :
Result, 10 cm is the focal length of the concave mirror., Precautions, 1. To get a well illuminated and distinct image of the distinct object, the distant object should be well, illuminated., 2. A concave mirror should be always placed near an open window., 3. The polished surface of the concave mirror and the distinct object should be facing each other., 4. There should not be any hurdle between the rays of light from the object and the concave mirror., 5. The screen and the concave mirror stand should be parallel to the measuring scale., 6. The mirror holder along with the mirror should be perpendicular to the measuring scale., , To determine focal length of a convex lens, Materials Required: A wooden bench, A convex lens, A lens holder, A screen fixed to a stand, A, measuring scale, Experimental Setup, , Procedure, 1., 2., 3., 4., 5., , Without disturbing the lens and screen, arrange both of them on the wooden bench., Place the lens on the holder facing a distant object., Place the holder with the screen on the bench., The position of the screen should be such that the sharp image of the distant object is obtained on it., The difference between the position of the lens and the screen is equal to the focal length of the given, convex lens., 6. Now shift the focus to towards various other distant object and calculate the focal length of the convex, lens., , Observation Table, Sl.no, , Position of convex lens (L), , Position of screen (S), , Focal length = (L-S) cm, , 1, 2, 3, Calculation, Following is the mean value of the focal length of convex lens:, Result: ________ is the focal length of the convex lens., Precautions, 1. The placing of the convex lens should be vertical., 2. There should not be any hurdle between the rays of light from the object and the convex lens., 3. To get a well illuminated and distinct image of the distinct object, the distant object should be well, illuminated., 4. The convex lens stand and the screen should be parallel to the measuring scale.
Page 12 :
Aim: To trace the path of a ray of light passing through a rectangular glass slab for different angles of, incidence. Measure the angle of incidence, angle of refraction, angle of emergence, and interpret the, result., Theory, The laws of refraction:, • The incident ray, the normal ray, and the refracted ray, all lie in the same plane., • Snell’s law: The law states that the ratio of the sine of an angle of incidence to the sine of the angle of, refraction is constant., Refraction of light: The refraction of light is a property of light in which the light changes its path when it passes, from one medium to the other., Lateral displacement: Lateral displacement is defined as the perpendicular shift in the path of light when it, emerges out from the refracting medium., , Materials Required: A drawing board, 4-6 all pins, White sheet of paper, Rectangular glass slab, A, protractor, A scale, A pencil, Thumb pins, Procedure, 1., 2., 3., 4., 5., 6., 7., 8., 9., 10., 11., 12., 13., 14., 15., , Fix a white sheet on the soft drawing board using thumb pins., Using a sharp pencil, draw the outline boundary of the glass slab, place it at the of the white paper., Let ABCD be the rectangular figure obtained by drawing., Mark point E on AB and draw a perpendicular EN and label it as a normal ray., Draw one angle of 30° with the help of protractor with EN. Fix pins at P and Q at 4-5 cm on the ray that is, obtained by the angle., Place the glass slab on the rectangular figure ABCD., To fix R and S, see through the glass slab of side CD, such that when seen through the glass slab, all the, pins P, Q, R, and S should lie in a straight line., Draw a small circle around the pins P, Q, R, and S and remove the pins., Remove the glass slab., Join points R and S such that it meets CD at point F. Draw a perpendicular N’M’ to CD at point F., Using a pencil, join the points E and F., Measure the angles formed at AB and CD, i.e, the incident angle, refracted angle, and emergent angle., The lateral displacement is obtained by extending the ray PQ in a dotted line which is parallel ray to FRS., Measure the lateral displacement., Repeat the same procedure for angle 45° and 60°., , Ray Diagram, , Observation Table, Sl.no, , 1, , Angle of incidence, ∠i = ∠PEN, , Angle of refraction, ∠r = ∠MEF, , Angle of emergence, ∠e = ∠SFM’, , ∠i – ∠e, ∠PEN – ∠SFM’
Page 13 :
2, 3, Due to human error the value of ∠i – ∠e may not be equal to zero., Conclusion, 1. The angle of incidence and the angle of emergence are almost equal., 2. As the light is traveling from rarer to denser optical medium, the angle of refraction will be lesser than the, angle of incidence., 3. For different angles of incidence, the lateral displacement will remain the same., 4. The light will bend towards the normal when it travels from an optically rarer medium to an optically, denser medium., , Precautions, 1., 2., 3., 4., 5., , The rectangular glass slab used should have perfectly smooth faces., The drawing board should be soft so that pins can be easily fixed on it., The angle of incidence should lie between 30° and 60°., All pins base should be in a straight line., The distance between the pins P and Q or the pins R and S, a minimum 5 cm gap should be maintained., , Aim: To trace the path of the rays of light through a glass prism., Theory, A prism is defined as a polyhedron with a triangular base and three triangular lateral surfaces. It is used, as an optical object to study the behaviour of white light when it is passed through it. The light bends at, various angles like an angle of incidence, angle of reflection, angle of refraction, and angle of deviation., What is prism formula?, Following is the formula of the angle of prism:, , Angle of deviation: The angle of deviation is defined as the angle between the incident ray and the, emerging ray. It is defined for the triangular prism., Materials Required: A white sheet, Soft board, Thumb pins, 4-6 all pins, Prism, Pencil, Scale, Protractor,, Drawing board, Experimental Setup, , Procedure, 1., 2., 3., 4., 5., , Fix a white sheet on a drawing board using drawing pins., Place the triangular prism resting on its triangular base. Using a pencil, draw the outline of the prism., Draw NEN normal to the face of the prism AB. make an angle between 30° and 60°., On the line PE, fix two pins at a distance of 5cm from each other and mark these as P and Q., Look for the images of the pins at P and Q through the other face of the prism AC.
Page 14 :
6. Fix two pins at R and S such that they appear as a straight line as that of the P and Q when it is viewed, from AC face of the prism., 7. Remove the pins and the prism., 8. At point F, make the points R and S meet by extending them., 9. PQE is the incident ray which is extended till it meets face AC. SRF is the emergent ray which is extended, backward to meet at point G., 10. Now mark the angle of incidence ∠i, angle of refraction ∠r and the angle of emergence ∠e and ∠D as, shown in the experimental setup., 11. Repeat the experiment for more angles between 30° and 60°., , Observations, 1. At surface AB, the light ray enters and bends towards the normal on refraction., 2. At surface AC, the light ray bends away from the normal as it travels from one medium (glass) to, the other (air)., 3. The angle of deviation is observed. Here, the emergent ray bends at an angle towards the, direction of the incident ray., Conclusion, 1. The incident ray bends towards the normal when it enters the prism and while leaving the prism, it bends away from the normal., 2. With the increase in the angle of incidence, the angle of deviation decreases. After attaining the, minimum value, it increases with an increase in the angle of incidence., Precautions, • For drawing the boundary of the prism, a sharp pencil should be used., • Soft board and pointed pins should be used., • The distance between the pins should be 5cm or more., • The pins should be fixed vertically and should be encircled when they are removed from the, board.
