Page 1 :
Header & Footer, Question: What is Header & Footer in Word Processing Software &, How it is insert in Document?, A header is the top margin of each page, and footer is the bottom margin of each page., Headers and footers are useful for including material that you want to appear on every page of, a document such as your name, the title of the document, or page numbers., एक Header, , Page का Top, , , और एक Footer, , Header और Footers उस Contents/Objects, Document, , Page, , Page का Bottom, , िजसे आप, , |, , , Document का Title या Page Numbers Etc., , Inserting Headers and Footers:, 1. To insert a header or footer, first go to the Insert tab and select the desired option from, , Header & Footer Tools Group., 2. After this Select Your Desired Style From Header or Footers. Or You Can Type Directly, Content Via Double Clicking on Top Margin or Bottom Margin., , Make the headers or footers different for odd and even pages, For example, you might choose to use the title of the document on odd pages, and the chapter, title on even pages., 1. On the Page Layout tab, click the Page Setup Dialog Box Launcher, and then click the, Layout tab., 2. Select the Different odd and even check box., Now you can insert the header or footer for even pages on an even page and the header, or footer for odd pages on an odd page., , www.kaishclasses.com
Page 2 :
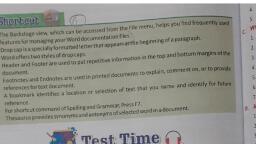
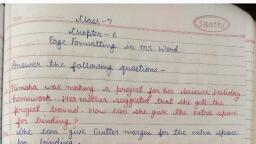
Drop Cap Text, A Drop Cap (dropped capital) is a large capital letter used as a decorative element at the, beginning of a paragraph or section. The size of a drop cap is usually two or more lines. By, Default it Covers 3 lines and maximum up to 10 lines., एक Drop Cap (Dropped Capital) एक Large Capital Letter का उपयोग एक Paragraph या, Section, , Drop Cap का, , Decorative Element, , Size, , Lines, , Default, , 3 Lines को Cover करता है, , 10 Lines को।, The following illustration shows your options for positioning a drop cap., , Page Setup Dialog Box, The Page Setup dialog box allows you to modify the appearance of the report,, document, filter, or hierarchy before viewing it, to ensure that the display appears as, desired., The Page Setup dialog box contains the following tabs or sections:, 1. Margins, 2. Paper, 3. Layout, 1. Margins Tab: Page margins are the blank space around the edges of the page., In general, you insert text and graphics in the printable area between the, margins. However, you can position some items in the margins — for example,, headers, footers, and page numbers., , Page margin options, Add margins for binding: Use a gutter margin to add extra space to, the side or top margin of a document that you plan to bind. A gutter, , www.kaishclasses.com
Page 3 :
margin helps ensure that text isn't obscured by the binding. 1:- Gutter Margin, For Binding 2:- Mirror Margins For Facing Pages, , Set margins for facing pages: Use mirror margins to set up facing pages for, double-sided documents, such as books or magazines. In this case, the margins, of the left page are a mirror image of those of the right page (that is, the inside, margins are the same width, and the outside margins are the same width)., , Add a book fold: Using the Book fold option in the Page Setup dialog box, you can, create a booklet. You can use the same option to create a menu, invitation, event, program, or any other type of document that uses a single center fold., , How to Change or set page margins, 1., , On the Page Layout tab, in the Page Setup group, click Margins., , 2., , Click the margin type that you want. For the most common margin, , width, click Normal., When you click the margin type that you want, your entire document, automatically changes to the margin type that you have selected., 3., , You can also specify your own margin settings. Click Margins, click, , Custom Margins, and then in the Top, Bottom, Left, and Right boxes, enter, new values for the margins., , 2. Paper Tab: Using Paper Tab User Can set Paper Size Such As Letter, Legal,, A4 etc. With the help of this tab user can also customize paper size to your own, choice by entering dimensions such width and height., www.kaishclasses.com


