Page 1 :
Microsoft Word Basics
Page 2 :
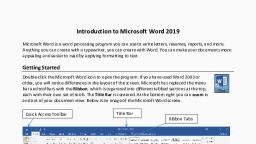
Getting Started, ●, , Open word. You may choose a blank document, or browse a template, that’s right for you. Blank or unformatted documents are best to use at, this stage of instruction., , ●, , The blue column on, the left shows your, most recent saved, files. You may select, one of these to, resume work on a, saved document.
Page 3 :
Margins, Cursor, Page, Scroll bar, , Zoom, , Page and word count, Read modes
Page 4 :
Quick save, , Undo, , Redo Quick print, , Quick Access toolbar, , Print preview, New document, , Customize toolbar, , You may add frequently used tools to, your quick access bar by right clicking, the tool button and selecting “add to, Quick Access toolbar”
Page 5 :
Home toolbar: font style & clipboard, Font name Font size, Clipboard: use to copy and paste, or, ctrl+c and ctrl+v, , Bold, , Italic, , Automated, cases, , Clear all, formatting, , Strikethrough, Underline, , Text effects, Superscript, Subscript, , Text color, Highlight
Page 6 :
Home toolbar: format paragraphs, Numbered list, Bulleted list, , Multilevel list, Increase and decrease, indentation, , Left, right, center,, justified alignments, , Line spacing, , Table drawing tools
Page 7 :
Home toolbar: editing tools, , Find, ctrl+f for PCs and Command-F for Macs,, allows you to find words within the text, Replace words with, other words in your, text, , Choose how to, select portions of, your text
Page 8 :
Now you, know your, basic tools!, , You can ignore the stylized presets to the, right of your home toolbar for now as, they can be cumbersome to customize
Page 9 :
Insert/add media, Add a preset cover, page, , Insert image files, saved to your, computer, , Create a table of, columns and rows, , Add a blank page, between pages of, text, Break your chapter, or subheading of, text to the next page, , Add shapes such as, arrows, , Add infographics, , Search images when, connected to the, internet with a Bing, image search, , Grab a screenshot, (for PCs press the, Prtscn key, then, paste your clipboard, contents. For Macs, press Command +, shift + 4 to copy, and, then paste your, clipboard contents)
Page 10 :
Insert/add media, Insert Wikipedia content, , Add or manage apps, , Search for or embed, online videos, Bookmark select, portions of your text, for easy reference, , Add headers,, footers, and page, numbers, , Hyperlink portions of your, text for reader’s reference, (e.g. subsections in legal, documents), , Link your text to outside, sources with a URL, (for example:, www.youtube.com), , Add comments for, multireader editing (to, delete comments go to the, Review/editing tab)
Page 11 :
Insert/add media, Add a moveable text, box to your article or, graphic design, Custom text-image, headings, , Automate format, templates for, recurring, stylized, text (such as, captions or asides), , Add an epigraphic, letter or word to, begin your article or, chapter, , Add a signature or, timestamp your, document, , Add another file or, document to your, current document, , Open math or, symbol menus, , Embed .swf files for, sound clips, throughout your text
Page 12 :
Page layout options, Divide text into, columns, , Page break, , Paper dimensions, , Manually adjust the, spacing before and, after paragraph, breaks, , Margin adjustment, in print inches, Portrait or landscape, orientation, , Number each line of, text, and hyphenate, each line item in list, , Manually adjust the, dimensions of, indentations, , Your menu listing names, of image files that appear, in the document for quick, toggling, , Position images within, text, select style of, “wrapping” text around, images, and select the, order in which multiple, layers of images will, appear. To test this, function, upload an image, to your document., , Align, group, or, rotate images
Page 13 :
As you add, tables and, images, more, tab menus, appear with, various tool, options, , They will be highlighted and color-coded as shown above., To stick to our basic agenda, we will skip these accessories, for now. But if you’re interested, many of the functions, include basic photo editing for more graphic documents, or, table editing, which gives you a greater range for, infographic presentations. Test out the tools as you would, any of the tools and effects described throughout this, dossier.
Page 14 :
References/works cited, Insert footnote or, endnote, , Add a preset,, formatted table of, contents, and, update an existing, table using the, buttons to the right., , Jump to next, footnote in your text, , Add and manage, sources, , Add a formatted, bibliography, according to what, type of document, you’re drafting, , Display menu of all, notes, , Add and link indexed, items, , Hyperlink portions of, text, , Insert captions, below images, , Formatting settings, for legal documents
Page 15 :
Review/edit, Always check, spelling & grammar!, , Find synonyms for, words you’ve used too, often throughout your, document, Translate and adjust, language settings, , Count total words in, document, Define a word by, highlighting and, clicking this button, , Add, delete, and, toggle through, document’s, comments by, multiple users, , Track changes that, have been made, throughout the, creation and editing, of your document, (very useful!), , Compare and, combine revisions of, same document, , Accept or reject, changes that have, been made by other, editors, , Control editing, capabilities (it’s a, privilege not a, right!)
Page 16 :
View options, See next slide (17), Read, document as, if it were a, pdf or epub, file, , Edit, document as, it will look, when printed, , Edit, document as, it will look, when printed, , Draft returns, you to regular, text edit as, opposed to, outline mode, , Show ruler, measurements or, grid to give you, spatial relations on, the page, , Navigate your, document, with quick, Magnify or, searches, broaden your, view of the, document, , Split or add, documents and, toggle between, each, , View the, document, one or two, pages at a, time, adjust, page width, , Arrange your split, windows, or, synchronize, scrolling, , Automate, frequently used, tasks by creating a, series of commands, and instructions, , Toggle, between your, documents
Page 17 :
Outlining, , Outlining is a simple way of creating a list or taxonomy, , Quickly refer to each level of your list, , When this is checked, it shows your, stylized/designed text, rather than the, normal text format, which looks more like, the text of this explanatory caption, , Insert other documents into or create, documents of portions of your outline, , When this is checked, it shows the first line only of the level you, have selected. The higher the level, the more lines are shown., , Start by typing your first and second lines. Then drag the minus, symbol at the head of the line right to subordinate the second, line to the first line
Page 18 :
Problems w/multi-user comments, , It is difficult to manage or delete comments from, the Insert tab. Instead, delete user comments, from the Review tab.
Page 19 :
Problems w/track changes, If you’re having trouble turning track changes off, be sure that it is unlocked., , This is what Track Changes looks like. The blue is unedited text, the, crossed-out red has been deleted by an editor, and the underscored red, word to the left of the deleted word is the word the editor chose to replace, the previous word. All red underscored words are additions made to the, original text.


