Page 1 :
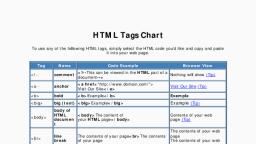
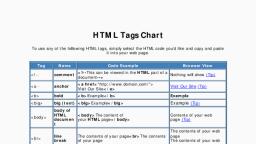
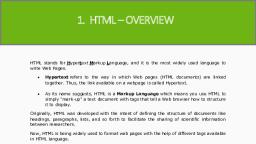
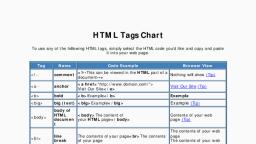
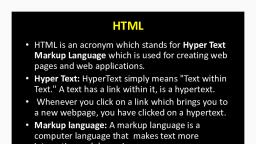
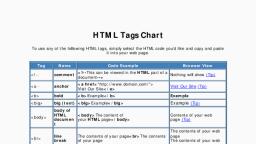
Introduction:, HTML means Hypertext Markup Language. It is a computer language which is the basic language of the internet. Web browsers recognize HTML “markup tags” and transform the tagged text into an enhanced, augmented appearance. That is, by using HTML, simple text and graphics are “marked up” to a more visually appealing and attractive form when viewed on a web browser.The document you create—containing all the text, the graphics, and the HTML markup tags—is called the HTML “source code document.” You can create an original document with any word processing program, even with something as simple as Notepad: Start Menu > Programs > Accessories > Notepad.Next, save the document on your computer as an HTML document, ending in .html or .htm (I prefer .html)., Note: tim berners lee developed html, What is HTML?, HTML is a markup language for describing web documents (web pages)., HTML stands for Hyper Text Markup Language, A markup language is a set of markup tags, HTML documents are described by HTML tags, Each HTML tag describes different document content, A Small HTML Document, Example, <!DOCTYPE html>, <html>, <head>, <title>Page Title</title>, </head>, <body>, , <h1>My First Heading</h1>, <p>My first paragraph.</p>, , </body>, </html>, Example Explained, The <!DOCTYPE html> declaration defines this document to be HTML5, The text between <html> and </html> describes an HTML document, The text between <head> and </head> provides information about the document, The text between <title> and </title> provides a title for the document, The text between <body> and </body> describes the visible page content, The text between <h1> and </h1> describes a heading, The text between <p> and </p> describes a paragraph, Using this description, a web browser will display a document with a heading and a paragraph., HTML Tags, HTML tags are keywords (tag names) surrounded by angle brackets:, <tagname>content goes here...</tagname>, HTML tags normally come in pairs like <p> and </p>, The first tag in a pair is the start tag, the second tag is the end tag, The end tag is written like the start tag, but with a forward slash inserted before the tag name, The start tag is also called the opening tag, and the end tag the closing tag., Web Browsers, The purpose of a web browser (Chrome, IE, Firefox, Safari) is to read HTML documents and display them., The browser does not display the HTML tags, but uses them to determine how to display the document:, HTML Page Structure, Below is a visualization of an HTML page structure:, <html><head><title>Page title</title></head>, <body>, <h1>This is a heading</h1>, <p>This is a paragraph.</p>, <p>This is another paragraph.</p>, </body></html>, Only the <body> section (the white area above) is displayed in a browser., Objective, HTML gives authors the means to:, Publish online documents with headings, text, tables, lists, photos, etc., Retrieve online information via hypertext links, at the click of a button., Design forms for conducting transactions with remote servers, for use in searching for information, making reservations, ordering products, etc., Incorporate spread-sheets, video clips, sound clips, and other applications directly in their documents., Note: you can elaborate this term with some example, Windows Switching, Windows switching in html denotes the ability of switching from one browser window to another with the help of hyperlinks, The <a> tag defines a hyperlink, which is used to link from one page to another., The most important attribute of the <a> element is the href attribute, which indicates the link's destination., By default, links will appear as follows in all browsers:, An unvisited link is underlined and blue, A visited link is underlined and purple, An active link is underlined and red, <a HREF="URL">text or graphic image</A>: defines an “anchored hypertextreference” (commonly known as a hyperlink), including the unique URL (Uniform Resource Locator or web address) of the target location to which a browser will jump when that link is activated by clicking on it. The file that a hyperlink targets or “calls up” when activated (clicked on) can be an HTML document, a graphic image, a sound, a video, or an executable program., The <a href> tag may contain within it another parameter as part of the command: TARGET="_blank": opens up the linked page, specified by the URL, into a new browser window. (Without the TARGET="_blank" parameter, the new page will replace the existing page in the same browser window.)Sometimes a hyperlink will jump to a certain location within another document, or even within the same document containing the hyperlink. In this case, two pairs of “anchor” (<a>) tags are required:, example, <html>, <body>, <a href="http://www.google.com" target="_blank">Visit click here for google</a>, <p>If you set the target attribute to "_blank", the link will open in a new browser window or a new tab.</p>, </body>, </html>, “”example””, <html>, <body>, <a href="http://www.google.com" >google</a>, <p>this will not open new window</p>, </body>, </html>, Images can also be used for windows switching, See code below, <html>, <body><p>, a link: <a href="http://www.google.com" target="blank">, <img border="0" alt="google" src="vb.jpg" width="100" height="100">, </a>, </p></body></html>, Above code will produce result like, After clicking on this image it will take you to google.com in new browser window as target has been set to blank:, Note: answering this qn will be easy ..if it is tested practically, Command tag:, <command> Tag, Definition and Usage, The <command> tag defines a command button, like a radiobutton, a checkbox, or a button., The command element is only visible if it is inside a menu element. If not, it will not be displayed, but can be used to specify a keyboard shortcut., Differences Between HTML 4.01 and HTML5, The <command> tag is new in HTML5, Attributes, New : New in HTML5., Contents of the command element, Content: Empty. All properties are coded using attributes., Since the <command/> tag is a void element, it is not allowed to have any content, even HTML comments and therefore should always be coded as a self-closing standalone tag, ending with the delimiters />rather than just > (<command .../>)., Examples, <command type="command" label="Save" icon="icons/save.png" onclick="save()">, <command/> Tag Examples, Examples of the command element in HTML 5, Changes in HTML 5 - <command/> Tag, What's new in HTML 5, The <command> tag is one of the new elements in HTML 5., The <command> tag did not exist in older versions of HTML., HTML Links, Links are found in nearly all web pages. Links allow users to click their way from page to page., HTML Links - Hyperlinks, HTML links are hyperlinks., You can click on a link and jump to another document., Note: A link does not have to be text. It can be an image or any other HTML element., HTML Links - Syntax, In HTML, links are defined with the <a> tag:, <a href="url">link text</a>, Example, <a href="http://www.example.com/html/">Visit our HTML tutorial</a>, The href attribute specifies the destination address (http://www.example.com/html/) of the link., The link text is the visible part (Visit our HTML tutorial)., Clicking on the link text will send you to the specified address., Note: you can write some bit of “windows switching “ in links:, new web page creation, ans:, note : write a procedure to create a web page , write html code , draw output window., Creating web page, For creating HTML document, only test editor is needed. No special software is needed. It can be created on any hardware platform using any text editor. It will not cost anything for its use. There is no expensive license to buy or no upgrades to purchase. To display the output of HTML document, we required any web browser like Internet Explorer, Mozilla., The following steps are use to create web pages., Step 1: Open a Notepad and type the following code., Step 2: Save the file as "Mypage.html" in 'C:' drive or in 'My documents'., Step 3: Start your internet browser. Select "Open" (or "Open Page") in the file menu of your browser. A dialog box appears. Select "Browser ("or choose File") and locate the HTML file you created “Mypage.html" - select it and click "open". Now search for the example "C:\mypage.html" in the dialog box. Click OK. The browser will display the page as shown in Figure., main body of the text, The basic tags include <html>, <title>, <meta>, and <body>. We introduce each of the four in the following:, <html>, This tag is used to indicate that this is a HTML document. Most HTML documents should start and end with this tag., <head>, This tag is used to indicate the header section of the HTML document, which typically includes the <title> and <meta> tags, and is not displayed in the main window of the browser., <title>, This indicates the title of this HTML page. The title is what is displayed on the upper left corner of your browser when you view a web page. For example, right now you can see "Basic Tags: html, head, title, meta, body" there. That is the title of this page., The title tag is important when it comes to search engine ranking. Many of the search engines pay special attention to the text in the <title> tag. This is because (logically) that words in the <title> tag indicate what the page content is., <meta>, The <meta> tag information is not directly displayed when the page is rendered on the browser. Rather, this is used for the author of the HTML page to record information related to this page. Two common attributes are name and content. The <meta> tag used to hold great importance in search engine optimization, with authors carefully drafting what's inside the tag to gain better search engine ranking, but recently its importance has been decreasing steadily., <body>, The <body> tag includes the HTML body of the document. Everything inside the <body> tag (other than those within the <script> tag) is displayed on the browser inside the main browser window., The <body> tag may contain several attributes. The most commonly used ones are listed below:, bgcolor: This is the background color of the entire HTML document, and may be specified either by the color name directly or by the six-digit hex code., alink: The color of the links., vlink: The color of the visited links., topmargin: The margin from the top of the browser window., leftmargin: The margin from the left of the browser window., So, in general, all HTML documents have the following format:, <html> , <head> , <title> , Here is the title of the HTML document. , </title> , <meta name=" " content=" " /> , ... (there may be one or more meta tags) , </meta> , </head> , <body> , Here is the body of the HTML document. , </body> , </html>, putting headers, Header Tags, The header tags <h1>, ... <h6> allows us to place additional importance on the text within such tags. <h1> has the largest size, and <h6> the smallest. Many search engines put additional weight on the texts within the header tags.By placing text inside of <h1> (heading) tags, the text displays bold and the size of the text depends on the number of heading (1-6). Headings are numbered 1-6, with 1 being the largest heading and 6 being the smallest, Any document starts with a heading. You can use different sizes for your headings. HTML also has six levels of headings, which use the elements <h1>, <h2>, <h3>, <h4>, <h5>, and <h6>. While displaying any heading, browser adds one line before and one line after that heading., Example<!DOCTYPE html><html><head><title>Heading Example</title></head><body><h1>This is heading 1</h1><h2>This is heading 2</h2<h3>This is heading 3</h3><h4>This is heading 4</h4><h5>This is heading 5</h5><h6>This is heading 6</h6></body></html>, Thiswillproducefollowingresult:, formatting text in HTML and font mechanism, If you use a word processor, you must be familiar with the ability to make text bold, italicized, or underlined; these are just three of the ten options available to indicate how text can appear in HTML and XHTML., Bold Text, Anything that appears within <b>...</b> element, is displayed in bold as shown below:, Example, <!DOCTYPE html>, <html>, <head>, <title>Bold Text Example</title>, </head>, <body>, <p>The following word uses a <b>bold</b> typeface.</p>, </body>, </html>, This will produce following result:, The following word uses a bold typeface., Italic Text, Anything that appears within <i>...</i> element is displayed in italicized as shown below:, Example, <!DOCTYPE html>, <html>, <head>, <title>Italic Text Example</title>, </head>, <body>, <p>The following word uses a <i>italicized</i> typeface.</p>, </body>, </html>, This will produce following result:, The following word uses a italicized typeface., Underlined Text, Anything that appears within <u>...</u> element, is displayed with underline as shown below:, Example, <!DOCTYPE html>, <html>, <head>, <title>Underlined Text Example</title>, </head>, <body>, <p>The following word uses a <u>underlined</u> typeface.</p>, </body>, </html>, This will produce following result:, The following word uses a underlined typeface., Strike Text, Anything that appears within <strike>...</strike> element is displayed with strikethrough, which is a thin line through the text as shown below:, Example, <!DOCTYPE html>, <html>, <head>, <title>Strike Text Example</title>, </head>, <body>, <p>The following word uses a <strike>strikethrough</strike> typeface.</p>, </body>, </html>, This will produce following result:, The following word uses a strikethrough typeface., Monospaced Font, The content of a <tt>...</tt> element is written in monospaced font. Most of the fonts are known as variable-width fonts because different letters are of different widths (for example, the letter 'm' is wider than the letter 'i'). In a monospaced font, however, each letter has the same width., Example, <!DOCTYPE html>, <html>, <head>, <title>Monospaced Font Example</title>, </head>, <body>, <p>The following word uses a <tt>monospaced</tt> typeface.</p>, </body>, </html>, This will produce following result:, The following word uses a monospaced typeface., Superscript Text, The content of a <sup>...</sup> element is written in superscript; the font size used is the same size as the characters surrounding it but is displayed half a character's height above the other characters., Example, <!DOCTYPE html>, <html>, <head>, <title>Superscript Text Example</title>, </head>, <body>, <p>The following word uses a <sup>superscript</sup> typeface.</p>, </body>, </html>, This will produce following result:, The following word uses a superscript typeface., Subscript Text, The content of a <sub>...</sub> element is written in subscript; the font size used is the same as the characters surrounding it, but is displayed half a character's height beneath the other characters., Example, <!DOCTYPE html>, <html>, <head>, <title>Subscript Text Example</title>, </head>, <body>, <p>The following word uses a <sub>subscript</sub> typeface.</p>, </body>, </html>, This will produce following result:, The following word uses a subscript typeface., Inserted Text, Anything that appears within <ins>...</ins> element is displayed as inserted text., Example, <!DOCTYPE html>, <html>, <head>, <title>Inserted Text Example</title>, </head>, <body>, <p>I want to drink <del>cola</del> <ins>wine</ins></p>, </body>, </html>, This will produce following result:, I want to drink, Deleted Text, Anything that appears within <del>...</del> element, is displayed as deleted text., Example, <!DOCTYPE html>, <html>, <head>, <title>Deleted Text Example</title>, </head>, <body>, <p>I want to drink <del>cola</del> <ins>wine</ins></p>, </body>, </html>, This will produce following result:, I want to drink, Larger Text, The content of the <big>...</big> element is displayed one font size larger than the rest of the text surrounding it as shown below:, Example, <!DOCTYPE html>, <html>, <head>, <title>Larger Text Example</title>, </head>, <body>, <p>The following word uses a <big>big</big> typeface.</p>, </body>, </html>, This will produce following result:, The following word uses a big typeface., Smaller Text, The content of the <small>...</small> element is displayed one font size smaller than the rest of the text surrounding it as shown below:, Example, <!DOCTYPE html>, <html>, <head>, <title>Smaller Text Example</title>, </head>, <body>, <p>The following word uses a <small>small</small> typeface.</p>, </body>, </html>, This will produce following result:, The following word uses a small typeface., <font>, The <font> tag is used to change the format of the text on the web page. The most important attributes are as follows:, face: The type of font. Common ones include "Time New Roman", "Verdana", and "Helvetica.", size: This indicates the size of the text. This can be absolute (0 .. 6), or relative ("+1", "+2", ... or "-1", "-2" ...), color: This indicates the color of the text. Either the color name or the six-character color code may be used to specify color., Below are some examples:, Example 1, HTML:, <font size=2 face="Helvetica" color=red>This illustrates the attributes of the font tag.</font>, Display:, This illustrates the attributes of the font tag., <!DOCTYPE html>, <html>, <body>, <p><font size="3" color="red">This is some text!</font></p>, <p><font size="2" color="blue">This is some text!</font></p>, <p><font face="verdana" color="green">This is some text!</font></p>, <p><strong>Note:</strong> The font element is not supported in HTML5. Use CSS instead.</p>, </body>, </html>, Fonts play very important role in making a website more user friendly and increasing content readability. Font face and color depends entirely on the computer and browser that is being used to view your page but you can use HTML <font> tag to add style, size, and color to the text on your website. You can use a<basefont> tag to set all of your text to the same size, face, and color., The font tag is having three attributes called size, color, andface to customize your fonts. To change any of the font attributes at any time within your webpage, simply use the <font> tag. The text that follows will remain changed until you close with the </font> tag. You can change one or all of the font attributes within one <font> tag., Note: The font and basefont tags are deprecated and it is supposed to be removed in a future version of HTML. So they should not be used rather, it's suggested to use CSS styles to manipulate your fonts. But still for learning purpose, this chapter will explain font and basefont tags in detail., Set Font Size, You can set content font size using size attribute. The range of accepted values is from 1(smallest) to 7(largest). The default size of a font is 3., Example, <!DOCTYPE html>, <html>, <head>, <title>Setting Font Size</title>, </head>, <body>, <font size="1">Font size="1"</font><br />, <font size="2">Font size="2"</font><br />, <font size="3">Font size="3"</font><br />, <font size="4">Font size="4"</font><br />, <font size="5">Font size="5"</font><br />, <font size="6">Font size="6"</font><br />, <font size="7">Font size="7"</font>, </body>, </html>, This will produce following result:, Font size="1", Font size="2", Font size="3", Font size="4", Font size="5", Font size="6", Font size="7", Relative Font Size, You can specify how many sizes larger or how many sizes smaller than the preset font size should be. You can specify it like <font size="+n"> or <font size="-n">, Example, <!DOCTYPE html>, <html>, <head>, <title>Relative Font Size</title>, </head>, <body>, <font size="-1">Font size="-1"</font><br />, <font size="+1">Font size="+1"</font><br />, <font size="+2">Font size="+2"</font><br />, <font size="+3">Font size="+3"</font><br />, <font size="+4">Font size="+4"</font>, </body>, </html>, This will produce following result:, Font size="-1", Font size="+1", Font size="+2", Font size="+3", Font size="+4", Setting Font Face, You can set font face using face attribute but be aware that if the user viewing the page doesn't have the font installed, they will not be able to see it. Instead user will see the default font face applicable to the user's computer., Example, <!DOCTYPE html>, <html>, <head>, <title>Font Face</title>, </head>, <body>, <font face="Times New Roman" size="5">Times New Roman</font><br />, <font face="Verdana" size="5">Verdana</font><br />, <font face="Comic sans MS" size="5">Comic Sans MS</font><br />, <font face="WildWest" size="5">WildWest</font><br />, <font face="Bedrock" size="5">Bedrock</font><br />, </body>, </html>, This will produce following result:, Times New Roman, Verdana, Comic Sans MS, WildWest, Bedrock, Specify alternate font faces, A visitor will only be able to see your font if they have that font installed on their computer. So, it is possible to specify two or more font face alternatives by listing the font face names, separated by a comma., <font face="arial,helvetica">, <font face="Lucida Calligraphy,Comic Sans MS,Lucida Console">, When your page is loaded, their browser will display the first font face available. If none of the given fonts are installed, then it will display the default font face Times New Roman., Note: Check a complete list of ., Setting Font Color, You can set any font color you like using color attribute. You can specify the color that you want by either the color name or hexadecimal code for that color., Note: You can check a complete list of ., Example, <!DOCTYPE html>, <html>, <head>, <title>Setting Font Color</title>, </head>, <body>, <font color="#FF00FF">This text is in pink</font><br />, <font color="red">This text is red</font>, </body>, </html>, This will produce following result:, This text is in pink, This text is red, The <basefont> Element:, The <basefont> element is supposed to set a default font size, color, and typeface for any parts of the document that are not otherwise contained within a <font> tag. You can use the <font> elements to override the <basefont> settings., The <basefont> tag also takes color, size and face attributes and it will support relative font setting by giving size a value of +1 for a size larger or -2 for two sizes smaller., Example, <!DOCTYPE html>, <html>, <head>, <title>Setting Basefont Color</title>, </head>, <body>, <basefont face="arial, verdana, sans-serif" size="2" color="#ff0000">, <p>This is the page's default font.</p>, <h2>Example of the <basefont> Element</h2>, <p><font size="+2" color="darkgray">, This is darkgray text with two sizes larger, </font></p>, <p><font face="courier" size="-1" color="#000000">, It is a courier font, a size smaller and black in color., </font></p>, </body>, </html>, This will produce following result:, This is the page's default font., Example of the <basefont> Element, This is darkgray text with two sizes larger, It is a courier font, a size smaller and black in color., Colors are very important to give a good look and feel to your website. You can specify colors on page level using <body> tag or you can set colors for individual tags using bgcolor attribute., The <body> tag has following attributes which can be used to set different colors:, bgcolor - sets a color for the background of the page., text - sets a color for the body text., alink - sets a color for active links or selected links., link - sets a color for linked text., vlink - sets a color for visited links - that is, for linked text that you have already clicked on., HTML Color Coding Methods, There are following three different methods to set colors in your web page:, Color names - You can specify color names directly like green, blue or red., Hex codes - A six-digit code representing the amount of red, green, and blue that makes up the color., Color decimal or percentage values - This value is specified using the rgb( ) property., Now we will see these coloring schemes one by one., HTML Colors - Color Names, You can sepecify direct a color name to set text or background color. W3C has listed 16 basic color names that will validate with an HTML validator but there are over 200 different color names supported by major browsers., Note: Check a complete list of ., W3C Standard 16 Colors, Here is the list of W3C Standard 16 Colors names and it is recommended to use them., EXAMPLE, Here are the examples to set background of an HTML tag by color name:, <!DOCTYPE html>, <html>, <head>, <title>HTML Colors by Name</title>, </head>, <body text="blue" bgcolor="green">, <p>Use different color names for for body and table and see the result.</p>, <table bgcolor="black">, <tr>, <td>, <font color="white">This text will appear white on black background.</font>, </td>, </tr>, </table>, </body>, </html>, HTML Colors (color settings)- Hex Codes, A hexadecimal is a 6 digit representation of a color. The first two digits(RR) represent a red value, the next two are a green value(GG), and the last are the blue value(BB)., A hexadecimal value can be taken from any graphics software like Adobe Photoshop, Paintshop Pro or MS Paint., Each hexadecimal code will be preceded by a pound or hash sign #. Following is a list of few colors using hexadecimal notation., EXAMPLE, Here are the examples to set background of an HTML tag by color code in hexadecimal:, <!DOCTYPE html>, <html>, <head>, <title>HTML Colors by Hex</title>, </head>, <body text="#0000FF" bgcolor="#00FF00">, <p>Use different color hexa for for body and table and see the result.</p>, <table bgcolor="#000000">, <tr>, <td>, <font color="#FFFFFF">This text will appear white on black background.</font>, </td>, </tr>, </table>, </body>, </html>, HTML Colors - RGB Values, This color value is specified using the rgb( ) property. This property takes three values, one each for red, green, and blue. The value can be an integer between 0 and 255 or a percentage., Note: All the browsers does not support rgb() property of color so it is recommended not to use it., Following is a list to show few colors using RGB values., EXAMPLE, Here are the examples to set background of an HTML tag by color code using rgb() values:, <!DOCTYPE html>, <html>, <head>, <title>HTML Colors by RGB code</title>, </head>, <body text="rgb(0,0,255)" bgcolor="rgb(0,255,0)">, <p>Use different color code for for body and table and see the result.</p>, <table bgcolor="rgb(0,0,0)">, <tr>, <td>, <font color="rgb(255,255,255)">This text will appear white on black background.</font>, </td>, </tr>, </table>, </body>, </html>, The HTML <menu> tag is used for creating a menu list. This tag has been deprecated in HTML and redefined in HTML5., Example, <!DOCTYPE html>, <html>, <head>, <title>HTML menu Tag</title>, </head>, <body>, <menu>, <li>ol - ordered list</li>, <li>ul - unordered list</li>, <li>dir - directory list</li>, <li>menu - menu list</li>, </menu>, </body>, </html>, This will produce following result:, ol - ordered list, ul - unordered list, dir - directory list, menu - menu list, Global Attributes, This tag supports all the global attributes described in -, Specific Attributes, The HTML <menu> tag also supports following additional attributes:, Event Attributes, This tag supports all the event attributes described in -, Browser Support, A directory list:, <dir>, <li>html</li>, <li>xhtml</li>, <li>css</li>, </dir>, Definition and Usage, The <dir> tag is not supported in HTML5. Use CSS instead., The <dir> tag is used to list directory titles., Browser Support, creation of links:, write a procedure for creating links take reference of qn “windows switching” and html links., inserting graphics:, <img> tag is used for inserting graphics and images , <img> tag is self closing tag , it takes attributes such as src=” ”, height=” ”, width= “ “, align=” ”,, But there is no mechanism to give graphics a caption, for this very reason <figure> tag has been included in html 5;, Example, Use a <figure> element to mark up a photo in a document:, <figure>, <img src="img_pulpit.jpg" alt="The Pulpit Rock" width="304"height="228">, </figure>, Definition and Usage, The <figure> tag specifies self-contained content, like illustrations, diagrams, photos, code listings, etc., While the content of the <figure> element is related to the main flow, its position is independent of the main flow, and if removed it should not affect the flow of the document., Example, Use a <figure> element to mark up a photo in a document. The <figure> element also contains a caption:, <figure>, <img src="img_pulpit.jpg" alt="The Pulpit Rock" width="304"height="228">, <figcaption>Fig1. - A view of the pulpit rock in Norway.</figcaption>, </figure>, Definition and Usage, The <figcaption> tag defines a caption for a element., The <figcaption> element can be placed as the first or last child of the <figure> element., Browser Support, The numbers in the table specify the first browser version that fully supports the element., using images, Images are very important to beautify as well as to depict many complex concepts in simple way on your web page. This tutorial will take you through simple steps to use images in your web pages., Insert Image, You can insert any image in your web page by using <img> tag. Following is the simple syntax to use this tag., <img src="Image URL" ... attributes-list/>, The <img> tag is an empty tag, which means that it can contain only list of attributes and it has no closing tag., Example, To try following example, let's keep our HTML file test.htm and image file test.png in the same directory:, <!DOCTYPE html>, <html>, <head>, <title>Using Image in Webpage</title>, </head>, <body>, <p>Simple Image Insert</p>, <img src="/html/images/test.png" alt="Test Image" />, </body>, </html>, This will produce following result:, Simple Image Insert, You can use PNG, JPEG or GIF image file based on your comfort but make sure you specify correct image file name in srcattribute. Image name is always case sensitive., The alt attribute is a mandatory attribute which specifies an alternate text for an image, if the image cannot be displayed., Set Image Location, Usually we keep our all the images in a separate directory. So let's keep HTML file test.htm in our home directory and create a subdirectory images inside the home directory where we will keep our image test.png., Example, Assuming our image location is "/html/image/test.png", try the following example:, <!DOCTYPE html>, <html>, <head>, <title>Using Image in Webpage</title>, </head>, <body>, <p>Simple Image Insert</p>, <img src="/html/images/test.png" alt="Test Image" />, </body>, </html>, This will produce following result:, Simple Image Insert, Set Image Width/Height, You can set image width and height based on your requirement using width and height attributes. You can specify width and height of the image in terms of either pixels or percentage of its actual size., Example, <!DOCTYPE html>, <html>, <head>, <title>Set Image Width and Height</title>, </head>, <body>, <p>Setting image width and height</p>, <img src="/html/images/test.png" alt="Test Image" width="150" height="100"/>, </body>, </html>, This will produce following result:, Setting image width and height, Set Image Border, By default image will have a border around it, you can specify border thickness in terms of pixels using border attribute. A thickness of 0 means, no border around the picture., Example, <!DOCTYPE html>, <html>, <head>, <title>Set Image Border</title>, </head>, <body>, <p>Setting image Border</p>, <img src="/html/images/test.png" alt="Test Image" border="3"/>, </body>, </html>, This will produce following result:, Setting image Border, Set Image Alignment, By default image will align at the left side of the page, but you can use align attribute to set it in the center or right., Example, <!DOCTYPE html>, <html>, <head>, <title>Set Image Alignment</title>, </head>, <body>, <p>Setting image Alignment</p>, <img src="/html/images/test.png" alt="Test Image" border="3" align="right"/>, </body>, </html>, Table, This section lists the tags often used with HTML tables: <table>, <tr>, and <td>., <table>, The <table> tag specifies the presence of a table. This is very often used in conjunction with the <tr> and the <td> tags. The following attributes are commonly used to define the properties of this table:, width: This specifies the width of the table. Can be specified in pixels or in relative terms (for example, 100%)., border: This specifies whether the table will have a border. The number indicates the thickness of the border., cellspacing: The amount spacing between the cell wall and the cell border. The area enclosed by the cell walls are the maximum amount of area that text can be displayed in a cell., cellpadding: The amount padding between cells and the each cell wall in a table., bgcolor: This specifies the background color for this table. The color value may be specified as the color name or the six-character color code., <tr>, The <tr> tag specifies the presence of a row. The following attributes are commonly used to define the properties of this row:, bgcolor: This specifies the background color for this row. The color value may be specified as the color name or the six-character color code., height: This specifies the height of the row., rowspan: This specifies the number of rows this particular row occupies., <td>, The <td> tag specifies the presence of a column. Columns are specified within each row. The following attributes are commonly used to define the properties of this column:, valign: This specifies how the text is vertically aligned inside the column. Common values include "top", "middle", and "bottom.", width: This specifies the width of the column. Can be specified in pixels or in relative terms (for example, 50%)., bgcolor: This specifies the background color for this column. The color value may be specified as the color name or the six-character color code., colspan: This specifies the number of columns this particular column occupies., Example 1, HTML:, <table border=1>, <tr><td>Element 1</td><td>Element 2</td><td>Element 3</td></tr>, <tr><td>Element 4</td><td>Element 5</td><td>Element 6</td></tr>, </table>, Display:, Example 2, HTML:, <table border=1 width=500>, <tr><td width=200>Element 1</td><td width=150>Element 2</td><td width=150>Element 3</td></tr>, <tr><td>Element 4</td><td>Element 5</td><td>Element 6</td></tr>, </table>, Display:, Example 3, HTML:, <table border=1 width=500>, <tr bgcolor=red><td width=200><b>Element 1</b></td><td width=150>Element 2</td><td width=150>Element 3</td></tr>, <tr><td bgcolor=55ff55>Element 4</td><td>Element 5</td><td><i>Element 6</i></td></tr>, </table>, Display:, Example 4, HTML:, <table border=1>, <tr><td>Element 1</td><td>Element 2</td><td>Element 3</td></tr>, <tr><td colspan=2>Element 4</td><td>Element 5</td></tr>, </table>, Display:, Example 5: cellspacing and cellpadding attributes., HTML:, <table border=1 cellspacing=10 cellpadding=0>, <tr><td>Element 1</td><td>Element 2</td><td>Element 3</td></tr>, <tr><td>Element 4</td><td>Element 5</td><td>Element 6</td></tr>, </table>, Display:, Example 6: cellspacing and cellpadding attributes., HTML:, <table border=1 cellspacing=0 cellpadding=10>, <tr><td>Element 1</td><td>Element 2</td><td>Element 3</td></tr>, <tr><td>Element 4</td><td>Element 5</td><td>Element 6</td></tr>, </table>, Display:, Example 7: cellspacing and cellpadding attributes., HTML:, <table border=1 cellspacing=10 cellpadding=10>, <tr><td>Element 1</td><td>Element 2</td><td>Element 3</td></tr>, <tr><td>Element 4</td><td>Element 5</td><td>Element 6</td></tr>, </table>, Display:, Html table header, <!doctype html>, <html>, <head><title></title></head>, <body>, <table border="1"><tr><th> Header 1 </th>, <th> Header 2</th>, </tr>, <tr><td> row 1, cell 1</td>, <td>row 1, cell 2</td> </tr>, </table>, </body></html>, Output:, HTML Table Rowspan, Table rowspan sets how many rows a cell spans and rowspan extends cells on a vertical row, <html>, <head><title></title></head>, <body><table border="1">, <tr>, <th rowspan="3">Stock</th>, <td>Android</td> <td>1493</td></tr>, <tr><td>Iphone</td> <td>3829</td> </tr>, <tr><td>Windows Phone</td> <td>0283</td></tr>, </table>, </body></html>, Output:, FORMS:, HTML Forms are required when you want to collect some data from the site visitor. For example during user registration you would like to collect information such as name, email address, credit card, etc., A form will take input from the site visitor and then will post it to a back-end application such as CGI, ASP Script or PHP script etc. The back-end application will perform required processing on the passed data, There are various form elements available like text fields, textarea fields, drop-down menus, radio buttons, checkboxes, etc., The HTML <form> tag is used to create an HTML form and it has following syntax:, <form action="Script URL" method="GET|POST">, form elements like input, textarea etc., </form>, Form Attributes, Apart from common attributes, following is a list of the most frequently used form attributes:, HTML Form Controls, There are different types of form controls that you can use to collect data using HTML form:, Text Input Controls, Checkboxes Controls, Radio Box Controls, Select Box Controls, File Select boxes, Hidden Controls, Clickable Buttons, Submit and Reset Button, Text Input Controls, There are three types of text input used on forms:, Single-line text input controls - This control is used for items that require only one line of user input, such as search boxes or names. They are created using HTML<input> tag., Password input controls - This is also a single-line text input but it masks the character as soon as a user enters it. They are also created using HTMl <input> tag., Multi-line text input controls - This is used when the user is required to give details that may be longer than a single sentence. Multi-line input controls are created using HTML <textarea> tag., Single-line text input controls, This control is used for items that require only one line of user input, such as search boxes or names. They are created using HTML <input> tag., Example, Here is a basic example of a single-line text input used to take first name and last name:, <!DOCTYPE html>, <html>, <head>, <title>Text Input Control</title>, </head>, <body>, <form >, First name: <input type="text" name="first_name" />, <br>, Last name: <input type="text" name="last_name" />, </form>, </body>, </html>, This will produce following result:, Top of Form, First name: , Last name:, Bottom of Form, Attributes, Following is the list of attributes for <input> tag for creating text field., Password input controls, This is also a single-line text input but it masks the character as soon as a user enters it. They are also created using HTML <input> tag but type attribute is set to password., Example, Here is a basic example of a single-line password input used to take user password:, <!DOCTYPE html>, <html>, <head>, <title>Password Input Control</title>, </head>, <body>, <form >, User ID : <input type="text" name="user_id" />, <br>, Password: <input type="password" name="password" />, </form>, </body>, </html>, This will produce following result:, Top of Form, User ID : , Password:, Bottom of Form, Attributes, Following is the list of attributes for <input> tag for creating password field., Multiple-Line Text Input Controls, This is used when the user is required to give details that may be longer than a single sentence. Multi-line input controls are created using HTML <textarea> tag., Example, Here is a basic example of a multi-line text input used to take item description:, <!DOCTYPE html>, <html>, <head>, <title>Multiple-Line Input Control</title>, </head>, <body>, <form>, Description : <br />, <textarea rows="5" cols="50" name="description">, Enter description here..., </textarea>, </form>, </body>, </html>, This will produce following result:, Top of Form, Description :, Bottom of Form, Attributes, Following is the list of attributes for <textarea> tag., Checkbox Control, Checkboxes are used when more than one option is required to be selected. They are also created using HTML <input> tag but type attribute is set to checkbox., Example, Here is an example HTML code for a form with two checkboxes:, <!DOCTYPE html>, <html>, <head>, <title>Checkbox Control</title>, </head>, <body>, <form>, <input type="checkbox" name="maths" value="on"> Maths, <input type="checkbox" name="physics" value="on"> Physics, </form>, </body>, </html>, This will produce following result:, Top of Form, Maths Physics, Bottom of Form, Attributes, Following is the list of attributes for <checkbox> tag., Radio Button Control, Radio buttons are used when out of many options, just one option is required to be selected. They are also created using HTML <input> tag but type attribute is set to radio., Example, Here is example HTML code for a form with two radio buttons:, <!DOCTYPE html>, <html>, <head>, <title>Radio Box Control</title>, </head>, <body>, <form>, <input type="radio" name="subject" value="maths"> Maths, <input type="radio" name="subject" value="physics"> Physics, </form>, </body>, </html>, This will produce following result:, Top of Form, Maths Physics, Bottom of Form, Attributes, Following is the list of attributes for radio button., Select Box Control, A select box, also called drop down box which provides option to list down various options in the form of drop down list, from where a user can select one or more options., Example, Here is example HTML code for a form with one drop down box, <!DOCTYPE html>, <html>, <head>, <title>Select Box Control</title>, </head>, <body>, <form>, <select name="dropdown">, <option value="Maths" selected>Maths</option>, <option value="Physics">Physics</option>, </select>, </form>, </body>, </html>, This will produce following result:, Top of Form, Bottom of Form, Attributes, Following is the list of important attributes of <select> tag:, Following is the list of important attributes of <option> tag:, File Upload Box, If you want to allow a user to upload a file to your web site, you will need to use a file upload box, also known as a file select box. This is also created using the <input> element but type attribute is set to file., Example, Here is example HTML code for a form with one file upload box:, <!DOCTYPE html>, <html>, <head>, <title>File Upload Box</title>, </head>, <body>, <form>, <input type="file" name="fileupload" accept="image/*" />, </form>, </body>, </html>, This will produce following result:, Top of Form, Bottom of Form, Attributes, Following is the list of important attributes of file upload box:, Button Controls, There are various ways in HTML to create clickable buttons. You can also create a clickable button using <input> tag by setting its type attribute to button. The type attribute can take the following values:, Example, Here is example HTML code for a form with three types of buttons:, <!DOCTYPE html>, <html>, <head>, <title>File Upload Box</title>, </head>, <body>, <form>, <input type="submit" name="submit" value="Submit" />, <input type="reset" name="reset" value="Reset" />, <input type="button" name="ok" value="OK" />, <input type="image" name="imagebutton" src="/html/images/logo.png" />, </form>, </body>, </html>, This will produce following result:, Top of Form, Bottom of Form, Hidden Form Controls, Hidden form controls are used to hide data inside the page which later on can be pushed to the server. This control hides inside the code and does not appear on the actual page. For example, following hidden form is being used to keep current page number. When a user will click next page then the value of hidden control will be sent to the web server and there it will decide which page has be displayed next based on the passed current page., Example, Here is example HTML code to show the usage of hidden control:, <!DOCTYPE html>, <html>, <head>, <title>File Upload Box</title>, </head>, <body>, <form>, <p>This is page 10</p>, <input type="hidden" name="pagename" value="10" />, <input type="submit" name="submit" value="Submit" />, <input type="reset" name="reset" value="Reset" />, </form>, </body>, </html>, Active images:, An Image Link, Here's an image. Its name is sally.gif. I will use it as a link to the HTML Goodies page., To replace the text above with the sally.gif image, you simply replace the text that would appear on the page with an image command calling for the sally.gif image. Like so:, <A HREF="index.html"><IMG SRC="sally.gif"></A>, This is what it gives you:, Go ahead, place your pointer over the image. It's active and it points to the HTML Goodies home page. You're done... almost., Removing the Blue Border, Look at the image above. See the blue border around it? That happens when you make an image active. Remember that when you make text into a link, that it turns blue? Well, that's what happens here. If you like it -- great. You're done. I think it looks unprofessional. I get rid of it. Here's how:, <A HREF="index.html"><IMG BORDER="0" SRC="sally.gif"></A>, Notice all I did was add the command BORDER="0" inside the image command, right between the IMG and the SRC. That sets the blue border around the active image to zero. Now, if you'd like, you can go the complete opposite way and write in BORDER="50". That will give you a huge blue border., Here's what you get with the command above:, Lay your pointer on the image -- it's still active, but no blue. That looks much more crisp., That's about it -- just allow me to remind you that all images should have HEIGHT, WIDTH, and ALT commands attached to them in order to make the transfer of pages much faster and easier to understand. But that is out of the realm of this tutorial, FRAMES AND FRAMESET, HTML frames are used to divide your browser window into multiple sections where each section can load a separate HTML document. A collection of frames in the browser window is known as a frameset. The window is divided into frames in a similar way the tables are organized: into rows and columns., Disadvantages of Frames, There are few drawbacks with using frames, so it's never recommended to use frames in your webpages:, Some smaller devices cannot cope with frames often because their screen is not big enough to be divided up., Sometimes your page will be displayed differently on different computers due to different screen resolution., The browser's back button might not work as the user hopes., There are still few browsers that do not support frame technology., HTML Frames, Frames allow you to have multiple sections of the browser window, called frames, each showing their own .html file within the frame. This used to be common practice when trying to show separate sections of a site in separate sections of the browser window, such as a header at the top, navigation at the side, and the rest was page content that someone could scroll down without making the header and navigation disappear., Frame sets are rarely used these days, as the introduction of server side scriping languages such as php and asp allow you to create content pages dynamically. The introduction of HTML5 has also provided new methods of doing page layouts without having to use frames., Frame Set - <frameset> ... </frameset>, Used instead of the body tag, the frameset tag defines a group of frames. Setting the rows andcols attribute allow you to create the number of frames needed for your layout., rows="??,??" - To set up multiple frames in rows, replace the question marks by the size of each row, either in pixels or as a percentage. A * can be used as a wild card, for instance:rows="100,*" would give you a top frame of 100 pixels high, and a bottom frame using the rest of the screen., cols="??,??" - Similar to rows, a number of frames can be set out in columns., border="?" - Frame border thickness in pixels., bordercolor="?" - of border between frames., Frame - <frame>, Each frame within a set will need a frame tag to tell it which web page to load in the frame. It uses the :, src="url" - Filename or URL of page to show in the frame, noresize="noresize" - The frame will not be able to be resized by a visitor, scrolling="auto" - Each frame will have vertical and horizontal scroll bars appear automatically when needed. You can change this by setting the scrolling attribute to yes, no, or auto., frameborder="auto" - Individual Frame Border. Set to 0, 1 to specify whether or not that frame must have a border., Unframed Content - <noframes> ... </noframes>, Very old browsers are unable to display frames, and in this case we need to specify what these browsers should display instead of the frames. Even though this is not much of a problem anymore, it is still suggested that you specify unframed content when using frames. Anything between the noframes tags will not be shown in modern browsers that show framed content., html>, <head>, <title>HTML Frames</title>, </head>, <frameset cols="25%,50%,25%">, <frame name="left" src="/html/top_frame.htm" />, <frame name="center" src="/html/main_frame.htm" />, <frame name="right" src="/html/bottom_frame.htm" />, <noframes>, <body>, Your browser does not support frames., </body>, </noframes>, </frameset>, </html>, HTML <frame> scrolling Attribute, HTML <frame> tag, Example, Frame A should always have scrollbars:, <frameset cols="50%,50%">, <frame src="frame_a.htm" scrolling="yes">, <frame src="frame_b.htm">, </frameset>, Definition and Usage, The <frame> tag is not supported in HTML5., The scrolling attribute specifies whether or not to display scrollbars in a <frame>., By default, scrollbars appear in a <frame> if the content is larger than the <frame>., Browser Support, Note: Internet Explorer 8 (and earlier) and Opera 12 (and earlier) supports the scrolling attribute. However, support was removed in IE9 and Opera 15., Syntax, <frame scrolling="auto|yes|no">, Attribute Values, SCROLLING says if there should be a scroll bar on the right and/or bottom of the frame. YES says there absolutely will be scroll bars, even if they are not needed. NO says there will not be scroll bars, even if they might be needed. AUTO is the default: there will be scroll bars on the side and/or bottom as needed., It's best to avoid using SCROLLING. If you turn off scrolling, users with small screens may be unable to see all of what you have in the frame, and that makes for an annoying page., FRAMES HANDLING, :, NOTE : in case of browser doesnot support frame we use <noframe> that should be written in frames handling, Alternative to frames, There are many disadvantages of using frames . these are:, Some smaller devices cannot cope with frames often because their screen is not big enough to be divided up., Sometimes your page will be displayed differently on different computers due to different screen resolution., The browser's back button might not work as the user hopes., There are still few browsers that do not support frame technology, Therefore there are some alternatives to frames:, The <div> tag is nothing more than a container unit that encapsulates other page elements and divides the HTML document into sections. Web developers use <div> elements to group together HTML elements and apply CSS styles to many elements at once. For instance, by wrapping a set of paragraph elements into a <div> element, the developer can take advantage of CSS styles and apply a font to all paragraphs at once by applying a font style to the <div> tag instead of coding the same style for each paragraph element., could be the second best alternative to Server Side Includes. This tag is supported by roughly 98% of browsers in use today. With little effort, an iframe is like a little sub-window within your pages. If you know any HTML whatsoever, you can use aniframe. It works much like regular frames by adding content of an external HTML file and inserting it into the parent HTML document, but doesn't require a frameset page. However, since using aniframe means that the navigation links are not actually a part of the parent page, your site may not perform as well in the search engines as it would if you used the other options, so I don't really recommend using this method., HTML Iframes, An iframe is used to display a web page within a web page., Iframe Syntax, An HTML iframe is defined with the <iframe> tag:, <iframe src="URL"></iframe>, The src attribute specifies the URL (web address) of the inline frame page., Iframe - Set Height and Width, Use the height and width attributes to specify the size of the iframe., The attribute values are specified in pixels by default, but they can also be in percent (like "80%")., Example, <iframe src="demo_iframe.htm" height="200" width="300"></iframe>, Iframe - Remove the Border, By default, an iframe has a border around it., To remove the border, add the style attribute and use the CSS border property:, Example, <iframe src="demo_iframe.htm" style="border:none;"></iframe>, With CSS, you can also change the size, style and color of the iframe's border:, Example, <iframe src="demo_iframe.htm" style="border:2px solid grey;"></iframe>, Iframe - Target for a Link, An iframe can be used as the target frame for a link., The target attribute of the link must refer to the name attribute of the iframe:, Example, <iframe src="demo_iframe.htm" name="iframe_a"></iframe>, , <p><a href="http://www.w3schools.com"target="iframe_a">W3Schools.com</a></p>, Read more at http://www.htmlcodetutorial.com/frames/_FRAME_SCROLLING.html#EAzKLw2UXlhSkDc9.99Top of Form, Bottom of Form


